How to Divide a Studio Apartment Into Zones
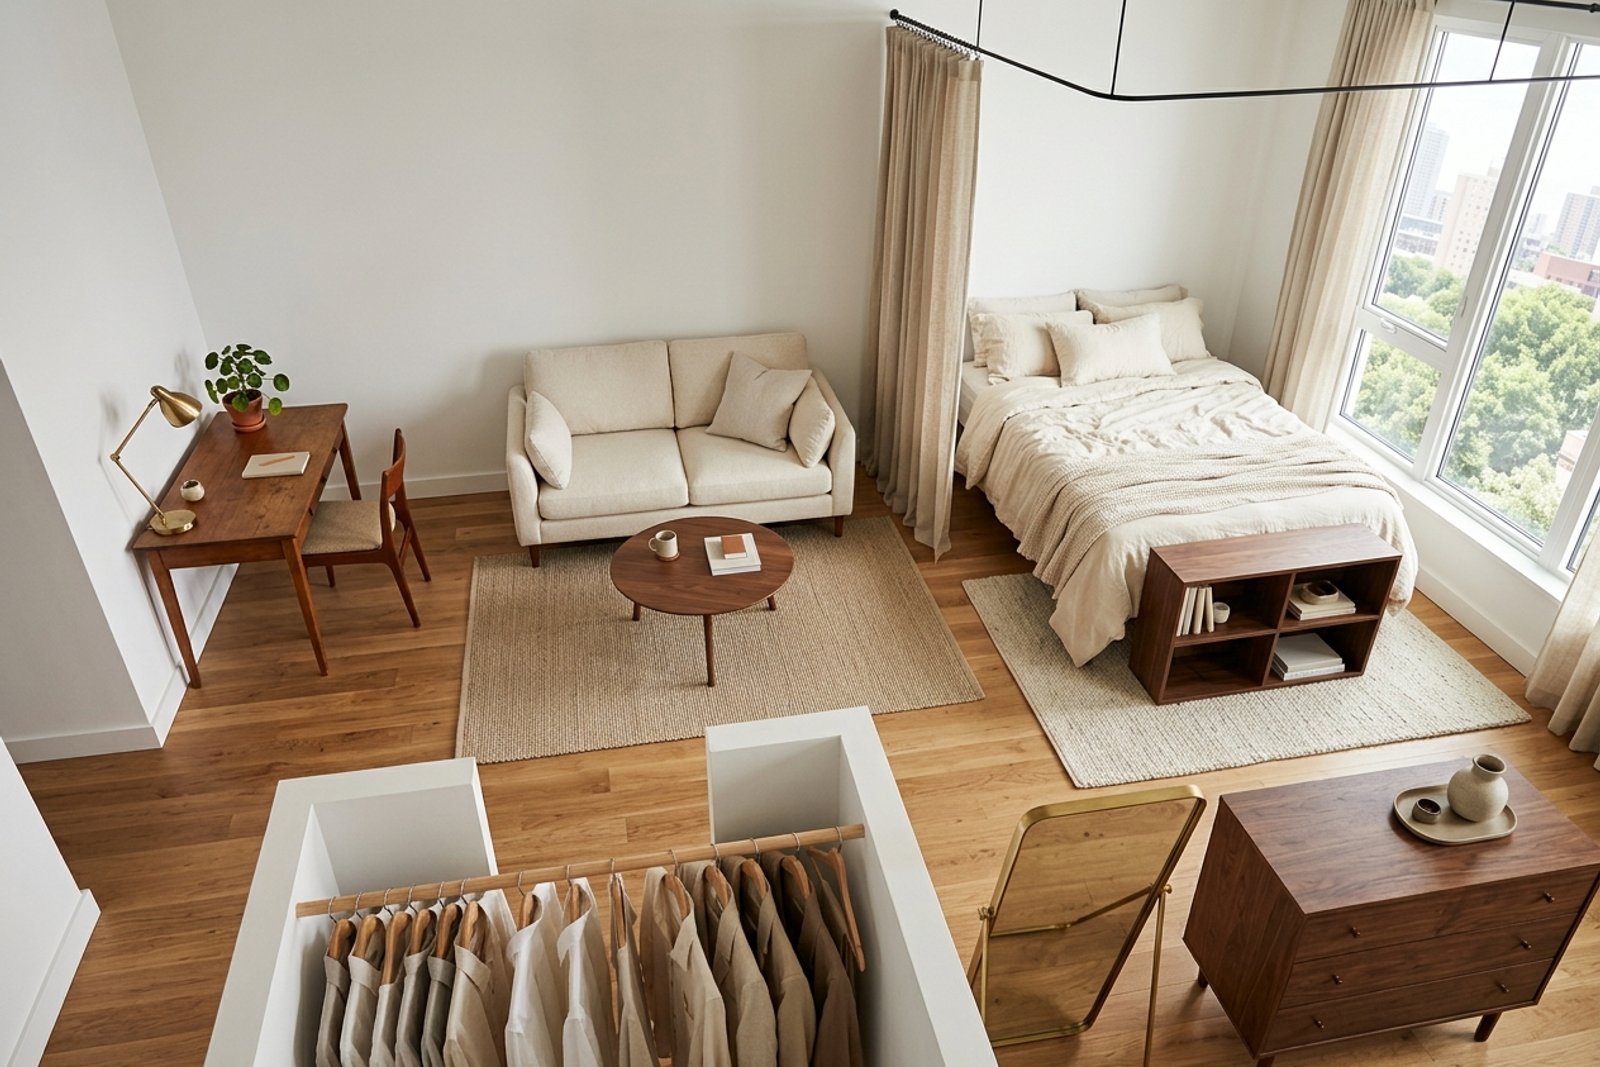
A 350 sq ft studio holds four real zones when you stack the right boundaries. Below is the renter sequence: place the bed first, hang a ceiling curtain on Command hooks, lay one rug per zone, and let lamp color temperature do the work a wall would.

A studio apartment feels like one cramped room until you split it into zones. The sequence below uses four lightweight boundaries to turn 350 sq ft into four functional areas without a single hole in the wall: a ceiling curtain on Command hooks, one rug per zone, lamp color temperature shifts, and the bed placed first to anchor the layout.
This is for renters in studios between 300 and 500 sq ft who sleep, work, cook, and host in the same square footage. If your apartment is over 800 sq ft or you can build into the walls, our broader small studio guide covers the wider footprint version of the same logic.
Why a studio feels smaller than its square footage
A 350 sq ft studio has roughly the floor area of a small one bedroom plus its living room combined. The reason it reads as one cramped room is not size. It is the lack of visual boundaries. When the bed, sofa, desk, and dining surface all sit in the same uninterrupted floor plane, your eye reads the room as a single function (sleeping), and every other function feels like it is borrowing the space. The fix is not adding walls. It is adding boundaries the eye can trust: a low partition, a rug edge, a lighting shift, a curtain pulled across at night. Once those boundaries hold, the same 350 sq ft starts reading as four rooms.
How do you divide a studio apartment without putting up walls?
Renters divide a studio without walls by stacking four lightweight boundaries: place the largest piece of furniture (the bed) first so it anchors a zone, hang a ceiling curtain on 3M Command hooks to separate sleep from the rest of the room, lay a different rug under each functional area, and shift the bulb temperature in each zone so the eye reads a color change at the boundary. None of this needs a drill, a contractor, or a landlord's permission. The four layers do the same work a wall would do: telling your brain "this is a different room." A 350 sq ft studio comfortably holds four zones using this approach: sleeping (bed plus side table), lounge (small sofa or chair plus coffee table), work or dining (desk or a small table), and dressing or storage (open closet, dresser, mirror).
What are the four zones to plan first?
The four zones most studios need are sleeping, lounging, working or dining, and dressing or storage. Plan them in that order because each one depends on the previous decision. The bed is the largest piece and the hardest to move, so its placement decides where every other zone goes. The lounge needs the second best wall, usually opposite or perpendicular to the bed, with the sofa or chair facing inward, not toward the bed. The desk or dining surface fills the next available wall, ideally near a window or close to the kitchenette so you are not eating off your nightstand. The dressing zone gets sized last because it can fit into the smallest leftover slot: an open clothing rack, a low dresser, a wall mounted hook bar, or a curtain pulled across the closet opening.
This sequence matters more in a studio than in a one bedroom because mistakes compound. A bed placed in the wrong corner forces the sofa into the kitchen path, which pushes the desk into the bedroom zone, which leaves no room for clothes. Move the bed last and you are working around a 60 inch piece of furniture in a 350 sq ft footprint. The broader logic of designing a one person apartment lives in Spatia's solo living interior design guide, but the zone sequence above is the layout specific version.
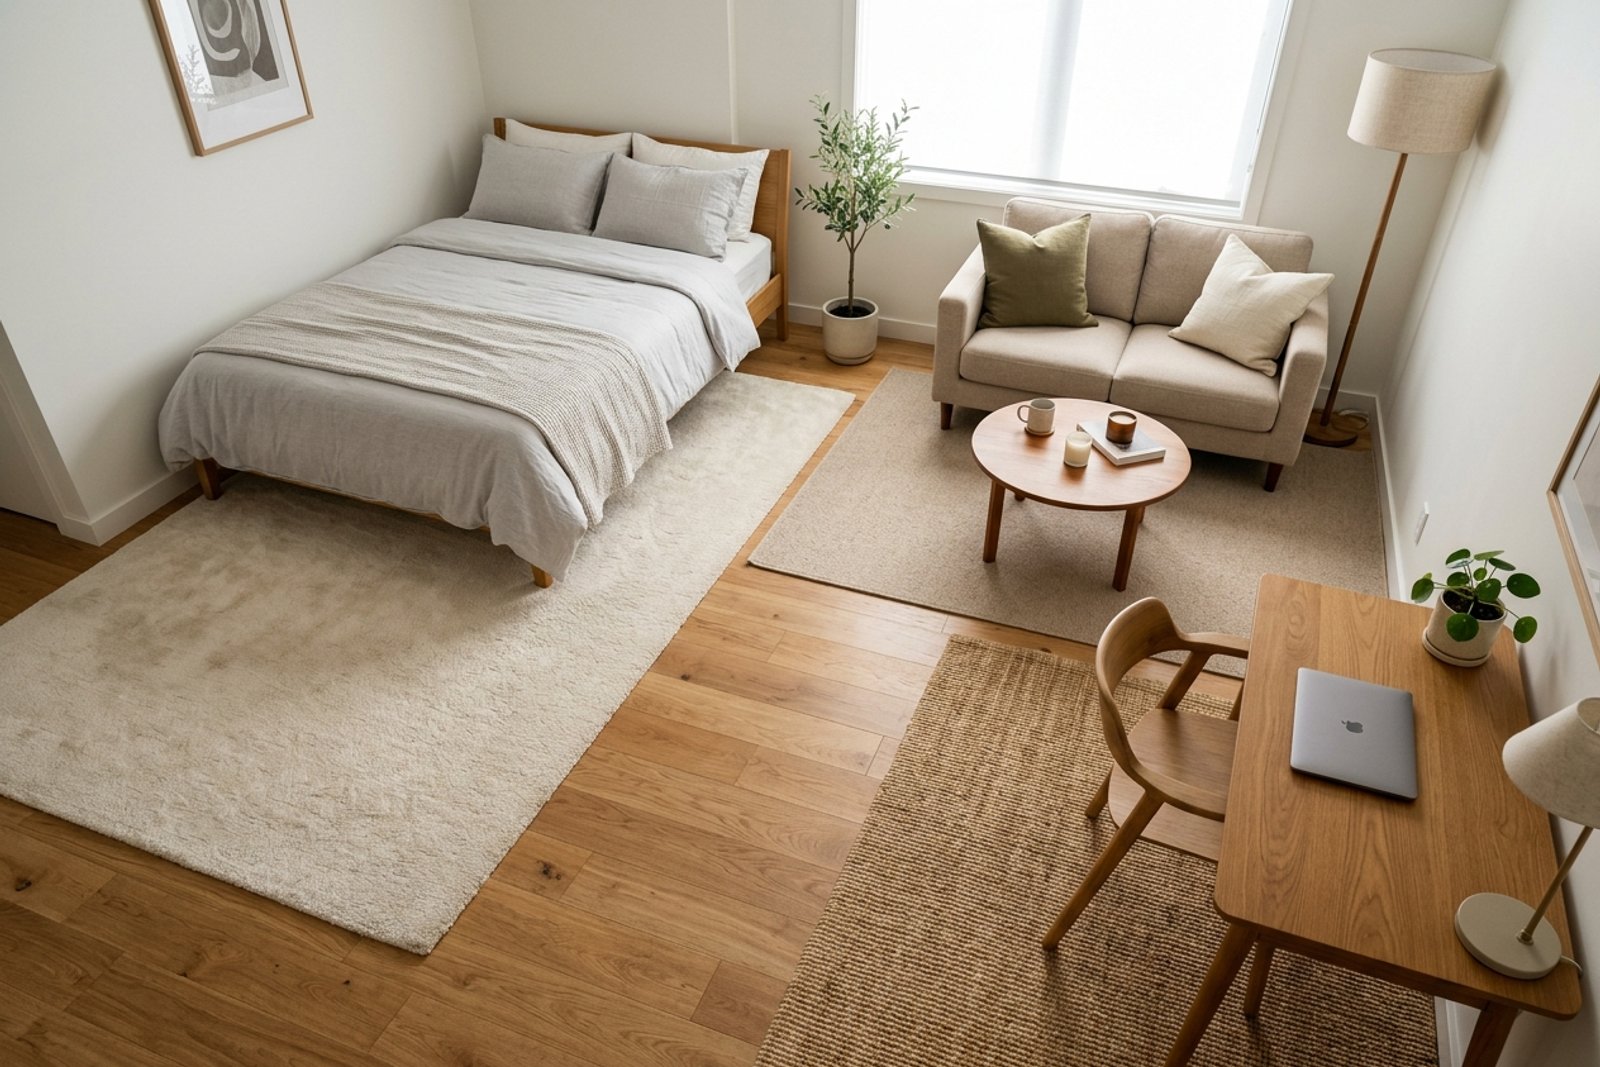
Place the bed first, parallel to the window
The bed is the anchor. In a studio, place it parallel to the window rather than against the same wall, for two reasons. First, parallel orientation means the long side of the bed faces the window, which gives you morning light across the whole body rather than just at the head. Second, it leaves the wall directly under the window free for a low credenza, a desk, or a plant shelf, which is where the studio's best natural light is sitting unused if the bed is blocking it.
Pull the bed at least 18 inches off the nearest wall when possible. Beds shoved into corners feel like they are hiding. A bed pulled 18 to 24 inches off the wall reads as the bedroom zone rather than overflow furniture. If your bed is a full or queen, position the headboard against a long wall and use a low bookshelf or open shelving unit at the foot to mark the boundary between sleep and the rest of the room. The bookshelf does not need to be tall: a 30 to 42 inch open unit reads as a soft wall without blocking light. The bedroom zone has its own deeper variant in our reading nook ideas for a small apartment, useful if you want a sitting corner inside the sleep zone.
A desk perpendicular to the window catches side light during the day and leaves the bed cooler at night. The 90 degree relationship between bed and desk also separates the two pieces visually, so the desk does not feel like the bed's twin.

Hang a curtain on Command hooks between the bed and the lounge
The single move that turns a studio into a "one bedroom" visually is a ceiling hung curtain between the sleeping zone and the rest of the room. The renter version uses 3M Command ceiling hooks: peel and stick, hold up to 5 pounds, leave no holes, and remove cleanly at move out. Run a thin curtain rod or wire across the ceiling at the boundary line you defined with the bed and bookshelf, then hang a curtain that can pull open during the day and close at night.
Three details make this work. First, the curtain should match the dominant wall color, not contrast with it. A linen curtain in oat, sand, or pale clay reads as a room divider; a bright graphic curtain reads as a statement piece that closes off half the apartment. Second, the curtain should reach the floor or just kiss it. A short curtain hovers and reads as temporary. A floor length curtain reads as architecture. Third, the curtain should be heavier than a sheer voile so it separates the zones, but lighter than blackout fabric so it does not block daylight when open.
The whole setup, including ceiling hooks, rod or wire, and curtain, runs $40 to $120 depending on the curtain length and fabric. For longer spans over 8 ft, use two hooks per support point and check the weight rating. The Command Outdoor Hooks rated for 7.5 pounds hold heavier linen panels than the indoor 5 pound version.
Mark each zone with its own rug
Rugs are the second boundary, doing horizontal work that the curtain does vertically. In a studio, use one rug per zone, sized to the furniture sitting on it rather than to the room. A 5 by 7 ft rug under the bed (sticking out 18 to 24 inches on each side and at the foot), a 4 by 6 ft rug in the lounge zone with the front legs of the sofa or chairs sitting on it, and a small 2 by 3 ft mat under the desk or at the dressing area is the rug stack for a typical 350 sq ft studio.
The rugs should differ in tone but stay in the same family. A pale wool under the bed, a slightly darker flatweave in the lounge, a small natural fiber mat under the desk: the eye reads the tonal shift as a zone change without the room feeling chopped up. Avoid matching all rugs to the same color and pattern (the boundaries disappear) or using a high contrast statement rug under the bed (the bedroom zone overwhelms the room).
Skip rug overlap. In larger apartments, layered rugs can look styled; in a 350 sq ft studio, overlap blurs the zone edges you are trying to define.
Use light temperature to separate zones at night
The third boundary is invisible during the day and decisive at night: bulb color temperature. The eye reads warm light (2700K) and neutral light (3500 to 4000K) as belonging to different rooms even when they are 6 ft apart. Use this to your advantage in a studio.
Set the lounge to warm (2700K) with one floor lamp or table lamp. Set the desk or dining zone to neutral (3500K to 4000K) with a focused task lamp. Set the bed to dim, low ambient warm (2700K) with a small bedside lamp or a string of warm fairy lights along the headboard. The kitchenette will likely have its own overhead, which is fine.
The overhead light in a studio is a switch you should rarely flip after sunset. Overheads at 4000K and above wash the whole room with one flat tone, which collapses the zoning you have built with rugs, curtains, and furniture placement. A studio that uses three or four lamps instead of one overhead reads as a furnished apartment, not a dorm.
Smart bulbs with color temperature control (Philips Hue, IKEA Tradfri) cost $15 to $30 per bulb and let you save a "lounge," "desk," and "sleep" scene that shifts the room mood without rearranging anything. For renters who do not want a smart system, a $7 warm 2700K bulb in every lamp is a simpler move with most of the same effect.
The dressing zone: closet curtain, mirror, dark wood dresser
The fourth zone is usually the leftover slot. In a studio with an actual closet, replace the door with a curtain on a tension rod and the closet becomes a small dressing room: the curtain hides the clothes, the wall inside holds a clip on light, and a small mirror leans against one side. In a studio without a closet, an open clothing rack, a low dresser, and a full length mirror against the wall do the same work in a 36 to 48 inch wide footprint.
The dresser is where the studio can borrow from a current furniture mood: a compact dark wood piece (walnut, warm oak, or chocolate) anchors the dressing zone in a way a pale particleboard dresser does not. The dark tone reads as a deliberate furniture moment in a room that is otherwise lighter, which keeps the eye returning to that corner as styled rather than functional. Look for a dresser between 30 and 40 inches wide and 32 to 36 inches tall; anything wider competes with the bed for the room's primary furniture role.
A full length mirror placed at a 30 to 45 degree angle to the window bounces window light back into the deeper part of the studio, making the dressing zone feel bigger without taking floor space.
Will this really fit in 350 sq ft?
A 350 sq ft studio comfortably holds the four zones described above. The math works because each zone is sized to the furniture sitting in it, not to a generous standalone room. A sleeping zone with a queen bed and side table takes roughly 50 sq ft including walk around space. A lounge zone with a small sofa (or two armchairs) and a coffee table takes 40 to 60 sq ft. A desk or small dining table with one chair takes 20 to 30 sq ft. A dressing zone with a dresser, hanging rack, and mirror takes 20 to 30 sq ft. Total zone footprint runs 130 to 170 sq ft, which leaves 180 to 220 sq ft for circulation, the kitchenette, and the bathroom path. That is enough to walk between zones without the studio feeling stuffed.
The constraint that breaks the plan: a studio under 300 sq ft, or a layout where the kitchenette splits the floor plate awkwardly. In those cases, fold the dressing zone into the bedroom zone (the closet becomes the dressing area, sharing the same boundary as the bed) and run only three primary zones. For ideas on the cooking and eating side, our home cafe corner in a small apartment covers that zone on its own.
A weekend plan for zoning a studio
- Day 1, morning. Measure the floor plan, mark the bed location parallel to the window, and pull the bed 18 to 24 inches off the wall.
- Day 1, afternoon. Install 3M Command ceiling hooks at the boundary between the bed and the lounge. Run the curtain rod or wire.
- Day 2, morning. Lay the rugs (bed zone, lounge zone, desk or dressing zone). Adjust furniture so each zone's main piece sits on its rug.
- Day 2, afternoon. Swap the bulbs. Warm 2700K in the lounge and at the bed, neutral 3500K to 4000K at the desk. Stop using the overhead after dark.
- Day 2, evening. Test the layout. Close the curtain. Sit in the lounge. Sleep one night and adjust in the morning.
The whole project, including rugs, curtain, hooks, bulbs, and a dresser if needed, runs $300 to $900 depending on what is already in the apartment.
Final thought
A studio apartment is not a smaller one bedroom. It is the same square footage rearranged into one room. The reason it feels cramped is rarely the size; it is the missing boundaries that let your eye and brain switch contexts. Four lightweight layers (a curtain, three rugs, two bulb temperatures, and a deliberate bed placement) do the work walls would do in a larger apartment. The studio still has one floor, but it stops feeling like one room.
The same boundary logic applies to a one bedroom with a small living room, just at a different scale. The deeper psychology of why a small apartment feels overwhelming, and the moves that calm it, lives in Spatia's small apartment design psychology guide.
Written by the Spatia Editorial Team. Spatia covers small space design from a renter's lens, with a focus on layouts that work before they photograph well.
Plan your studio zones with Archie
Send Archie a photo of your studio. Archie returns a four zone layout, the bed placement, the curtain divider line, and the rug sizes that fit your floor plan, with no drilling required.
Plan my studio with ArchieRelated Articles

9 Reading Nook Ideas for a Small Apartment in 2026
A reading nook in a small apartment is one chair, one warm lamp, and a 30 inch corner you commit to. Nine moves below cover the renter safe corner, the closet variant rising 55 percent on Pinterest, and the storage ottoman window seat that needs no built in.

How to Cool a West Facing Room Without AC: A Renter's Afternoon Heat Guide
West facing rooms feel fine at breakfast and unbearable by dinner. Here is the renter-safe cooling sequence that blocks late-day sun, dumps stored heat after sunset, and makes a small apartment sleepable without installing AC.

How to Build a Home Cafe Corner in a Small Apartment
A home cafe corner doesn't need a full bar setup. With a 24 by 16 inch footprint, four brewing tools that earn their place, and one material shift to mark the zone, a small apartment can hold a slow morning ritual without losing the rest of the room.